Test Notifications via Slack
Launchable's Test Notifications feature notifies developers via Slack when their test sessions finish so they can immediately take action on the results, whether to triage failures or merge a PR. Developers can create subscriptions to receive personal notifications about test sessions run against their branches/pull requests or other test sessions they care about.


Getting started
To set up notifications:
Start sending data to Launchable
Install the Launchable Slack app in your Slack workspace
Link your Launchable account and your Slack account
Create your first notification subscription in Slack
Sending data to Launchable
See Sending data to Launchable.
Installing the Launchable Slack app
Log into the Launchable dashboard.
Go to Test Notifications.
Click the Install Slack App button in the Slack app section.
This will open the Slack app authorization flow. You may need to log in to Slack at this stage.Authorize the app to install it.
Done! 🎉
Linking your Launchable and Slack accounts
Once the Launchable Slack app has been installed, you and your teammates can link your Launchable and Slack accounts. This lets you set up subscriptions via the app.
If you haven't signed up for Launchable yet, or if you're not a member of your team's Launchable organization yet, ask a teammate to send you an #Organization invitation link so you can sign up (if needed) and join.
You communicate with the app through direct messages:
In Slack, click the New message icon in the top section of the left navigation (or use the Command+N or Control+N keyboard shortcut) to compose a new message.
In the "To:" field, type Launchable and select the app from the dropdown list.
In the message text field, type /launchable link and hit Enter.
Click the button in the response message to initiate the flow to connect your Launchable account to your Slack account.
Creating a notification subscription
After you've linked your Launchable and Slack accounts, you can create your first notification subscription.
Via UI
After linking your account, you can create a new subscription from the home tab of the Launchable app in Slack:


Via message
You can also create a subscription by sending a message to the Launchable app. The syntax for creating a subscription is:
/launchable subscribe <WORKSPACE> <KEY>=<VALUE><WORKSPACE>is the workspace's name containing the test sessions you want to be notified about.<KEY>=<VALUE>is a key-value pair that contains the CI environment variable and value that indicates the test sessions you want to subscribe to (e.g.,GITHUB_ACTOR=octocat). More on this below ⤵
Common key-value pairs for subscriptions
Typically, you'll want to be notified about your test runs. Each CI system has an environment variable that indicates the user that kicked off a build or pipeline.
For example, GitHub Actions has an environment variable called GITHUB_ACTOR. So if you use GitHub Actions, you can subscribe to your test runs using a command such as:
/launchable subscribe <YOUR_LAUNCHABLE_WORKSPACE> GITHUB_ACTOR=<YOUR_GITHUB_USERNAME>The tabbed section below describes how to compose /launchable subscribe for major CI tools:
| Environment variable | BUILD_REQUESTEDFOREMAIL |
| Description | The person who pushed or checked in the changes. |
Example:
/launchable subscribe <YOUR_LAUNCHABLE_WORKSPACE> Build.RequestedForEmail=<YOUR_EMAIL_ADDRESS>Other key-value pairs
Since the subscription mechanism is based on CI environment variables, you have a lot of flexibility regarding subscriptions. CI tools expose many environment variables (and you can add your own) that you can pass into /launchable subscribe to create custom subscriptions. For more info, check out your CI tool's documentation.
Receiving notifications
Once you've set up a subscription, the Launchable app will send you a personal message each time a new test session matching the subscription criteria is recorded:
| Passing notification | Failing notification |
|---|---|
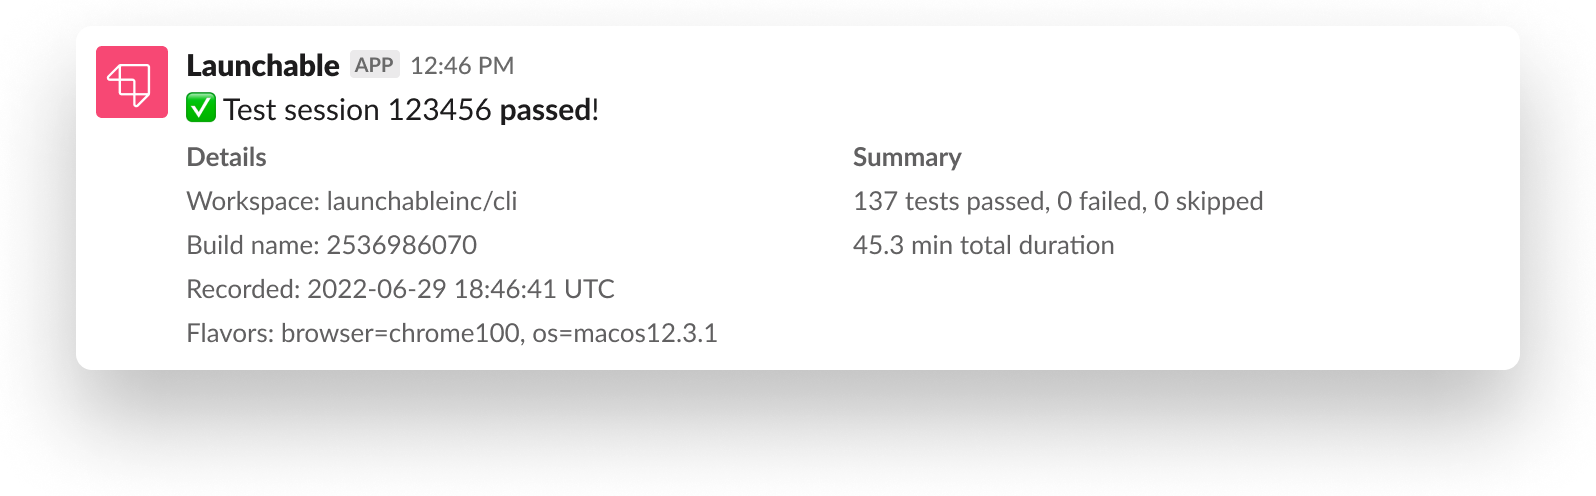 |
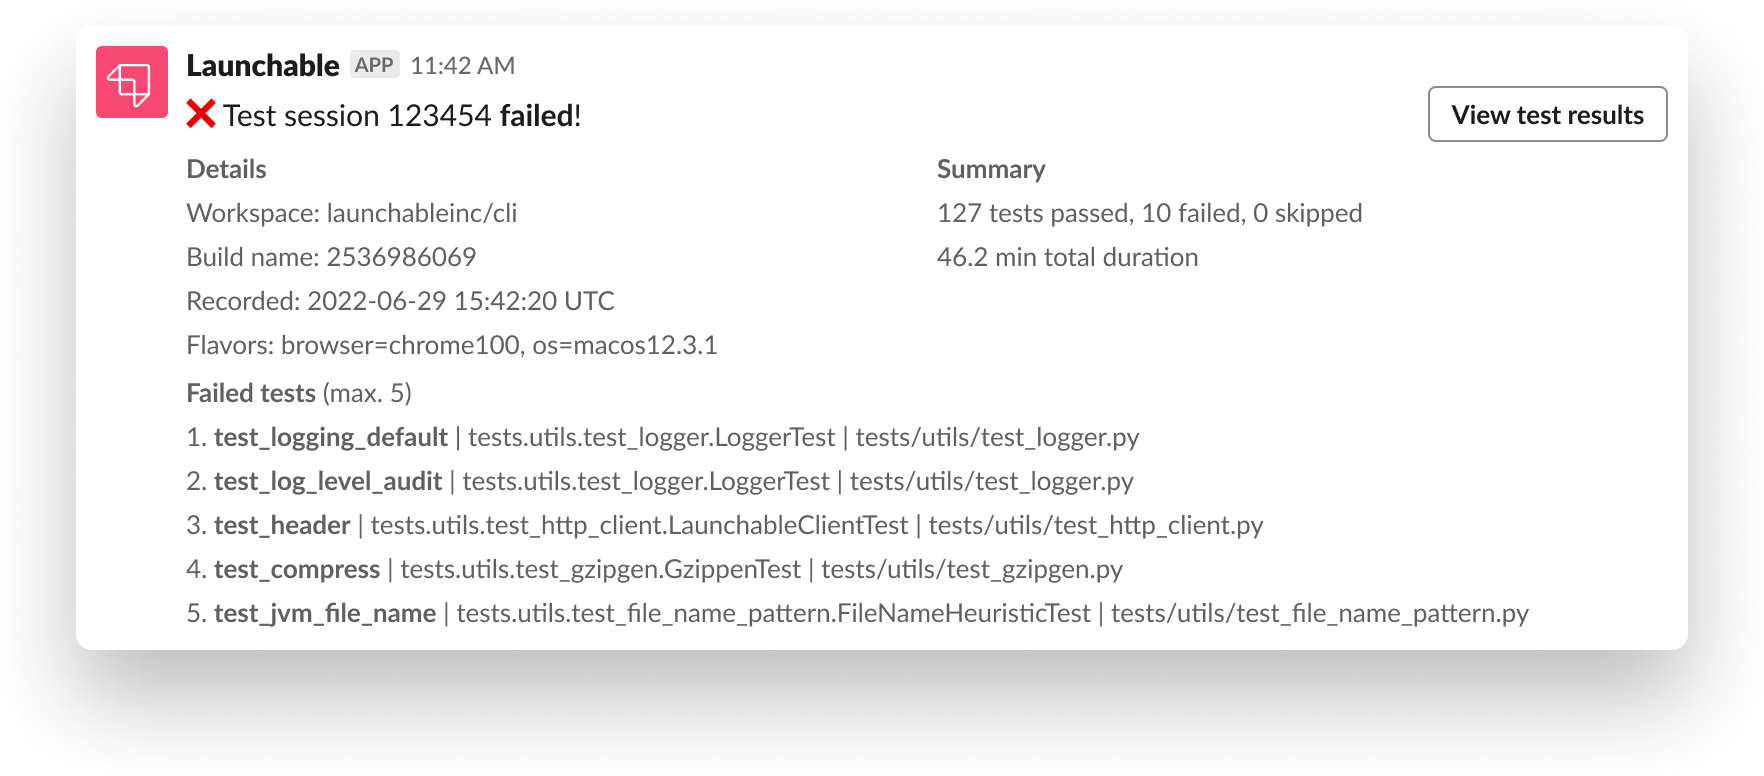 |
Failing notifications include a link to view test results in Launchable and a quick summary of failing tests, including annotations for Unhealthy Tests. This helps you get started triaging without checking your email over and over.